Electronic Reporting (ER) in Dynamics 365 Finance and Operations (D365FO) is a no-code tool that empowers business users to design, generate, and customize electronic documents like invoices, tax reports, and payment files—without needing developer help.
What Makes ER So Useful?
1. No Coding Needed: Business users can configure reports and formats.
2. Supports Multiple Formats: Excel, PDF, XML, CSV, etc.
3. Legal Compliance: Keeps your documents aligned with local regulations.
4. Reusable Models: Use the same setup across multiple reports.
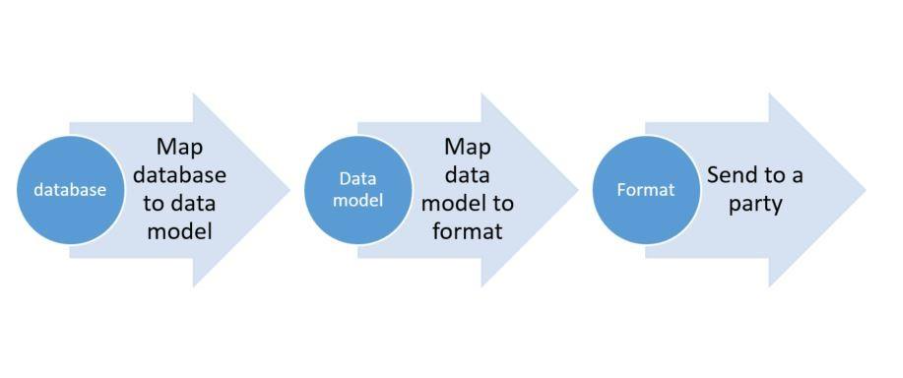
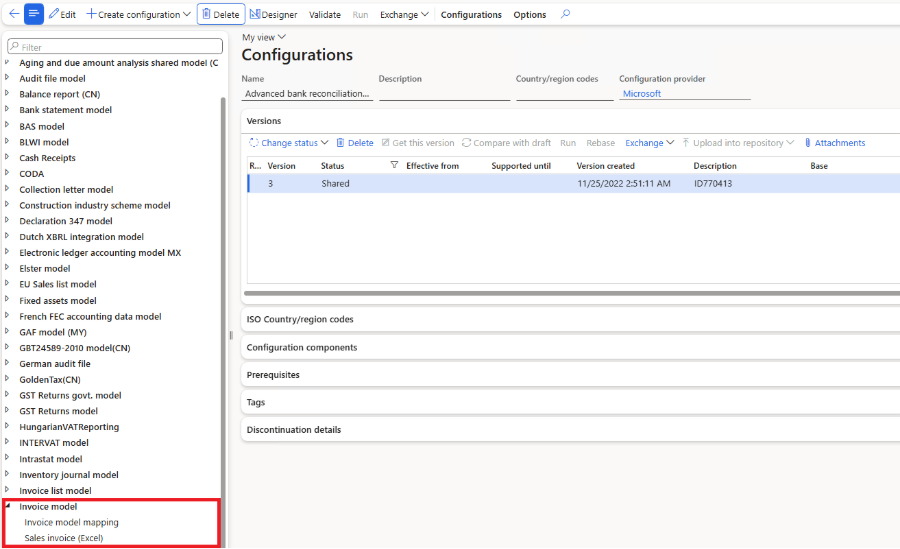
Key Components of ER
1. Data Sources: Where your data lives (Tables or Entities in D365FO).
2. Data Model: Think of this as a blueprint that structures your data for reporting.
3. Model Mapping: Maps system data to your data model.
4. Format: The final report layout (Excel, XML, etc.)
5. Format Mapping: Connects the model to the layout (What goes where in your report)
Image Reference: This visual shows how ER works from data source to output format in a single glance.
How to Get Started with ER?
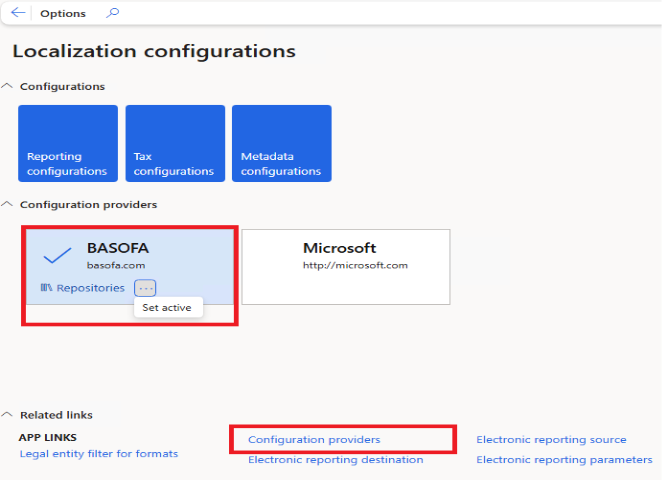
1. Go to Organization administration > Workspaces > Electronic reporting
2. Set up a Configuration Provider (usually your company name)
3. Import existing templates from Lifecycle Services (LCS)
4. Customize them as per your needs
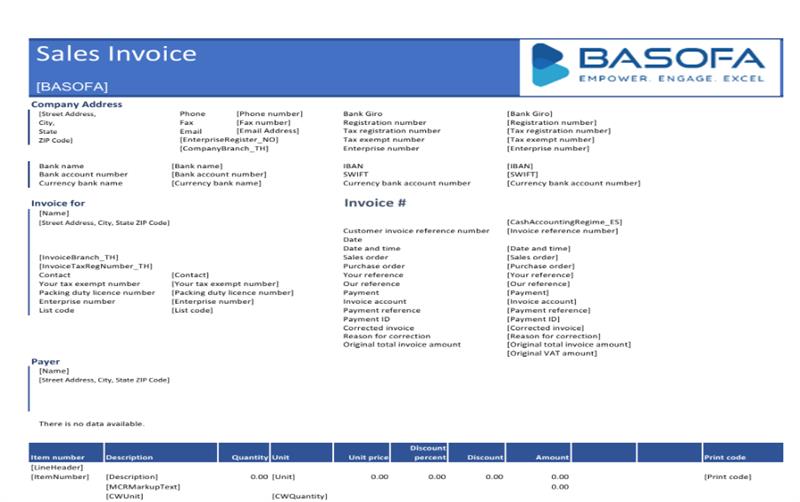
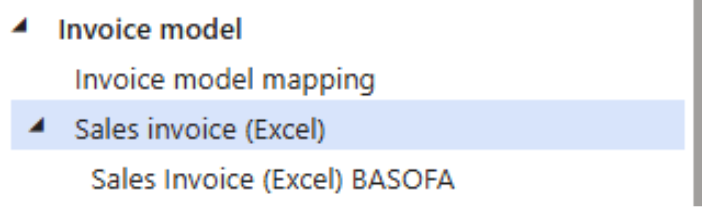
Real-World Example: Customizing a Sales Invoice Report
Let’s say you want to change how your Sales Invoice looks. Here’s the quick process:
1. Create a Derived Configuration: Start from Microsoft’s base config and derive your own.
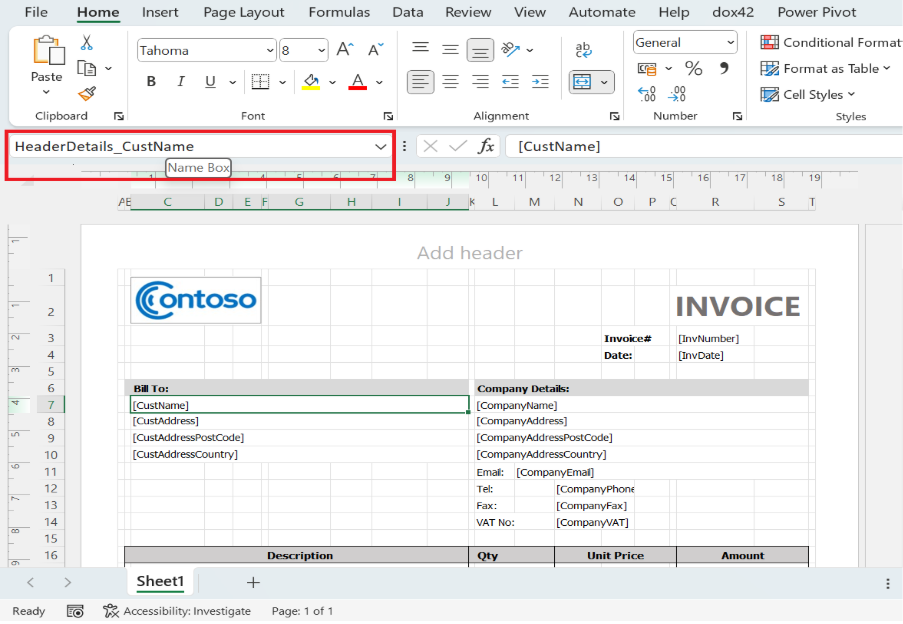
2. Download and Edit the Excel Template: Add logos, change layout, or add new fields (like customer name, invoice date, etc.).
3. Name the Fields: Use Excel’s Name Box (above cell A1) to define fields that map to data.
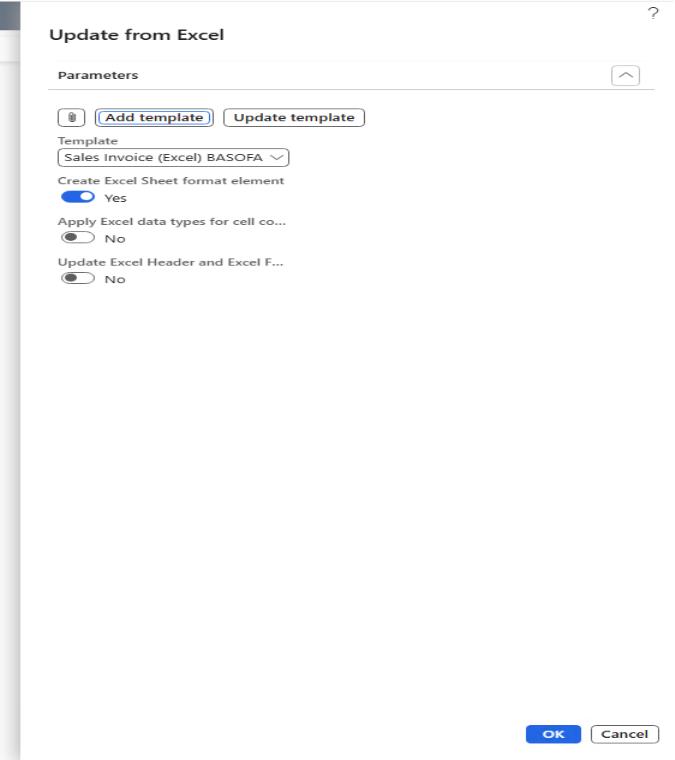
4. Upload and Map the Fields: Go back to ER designer, upload the Excel file, and map each field to data in D365FO.
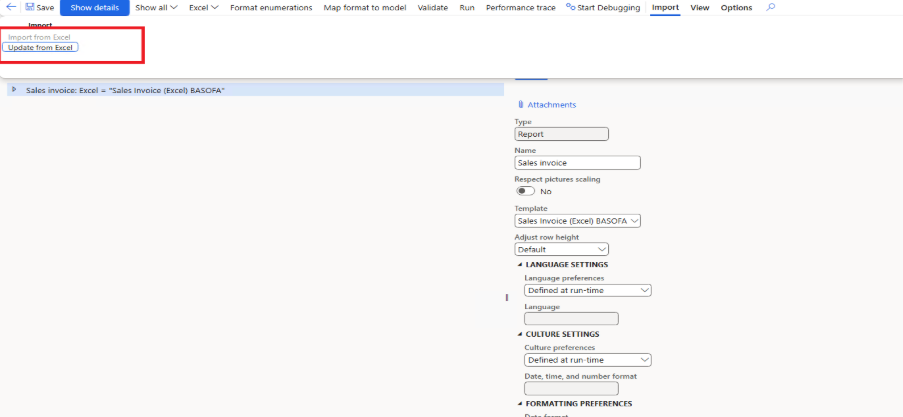
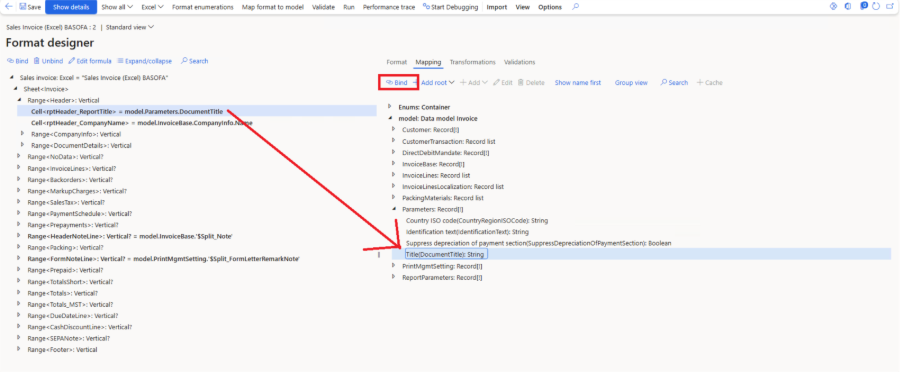
5. Validate and Save: Once mapping is done, validate and save your report layout.
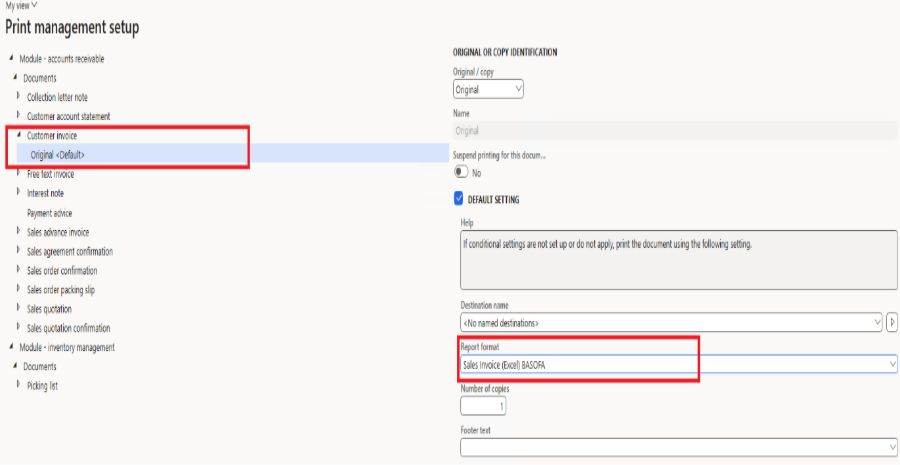
6. Set in Print Management: Make your custom invoice the default one used by the system.
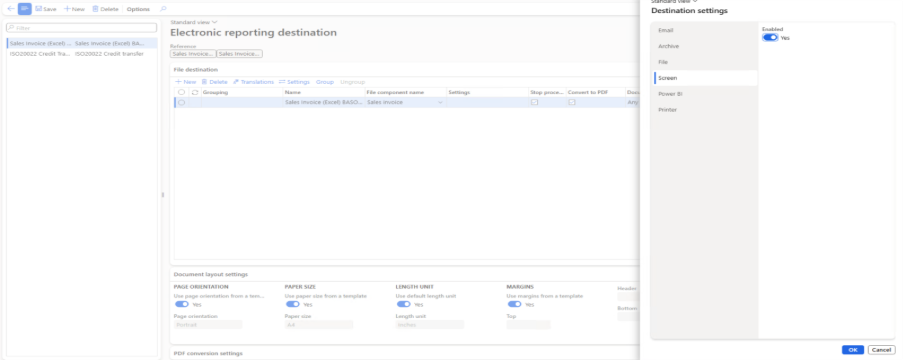
Output Options: Send It Where You Want
With ER Destinations, you can route your output to:
1. Screen
2. Email
3. SharePoint
4. Local File
Just go to: Organization administration > Electronic reporting > Electronic reporting destination
Generate Your First Custom Sales Invoice
Once you’ve completed the steps:
1. Go to All Sales Orders
2. Open any invoiced sales order
3. Choose Print > Use print management
Your custom Excel-based Sales Invoice will now be generated, ready to impress both internal teams and customers.